
Common workflows and support questions for group/lab users are addressed below. Group users are defined as being a member of a group or lab who are using iLab to order services and/or equipment from a core or shared resource.
Are you a core user? Visit our Core User Support page
If you have additional questions, please visit the iLab help page, submit a help ticket, or or e-mail support@ilab.wisc.edu.
Getting Started
This is an accordion element with a series of buttons that open and close related content panels.
What is iLab?
iLab is an online scheduling and billing system that allows researchers to submit work requests and to schedule equipment with UW shared resources. Visit our core directory for more information on each core.
Group/Lab Administrative Roles
Group/lab administration includes the principal investigator, the manager(s) and the primary contact. These roles have the following capabilities:
- Manage memberships
- Manage fund assignments
- Manage budgets
- Approve service requests
- Manage payment selections on services
- Review, approve and manage all invoices
What is the PI role in iLab?
As a PI, you are responsible for accepting your group members into your group/lab, adding in funding strings and assigning them to the appropriate researchers. These responsibilities may be delegated to a manager once the PI account and group is created in iLab.
How do I access iLab?
Existing users log into iLab at https://uwmadison.ilab.agilent.com/account/login
New PIs and new members should follow the instructions in the “Registering for an account” tabs below.
Registering for an account as a UW PI
REGISTERING FOR AN ACCOUNT
- Navigate to the iLab login page and click the ‘Register’ button in the top right of the screen then click the ‘Registering using UW credentials’ link.
- Log in with your NetID and password.
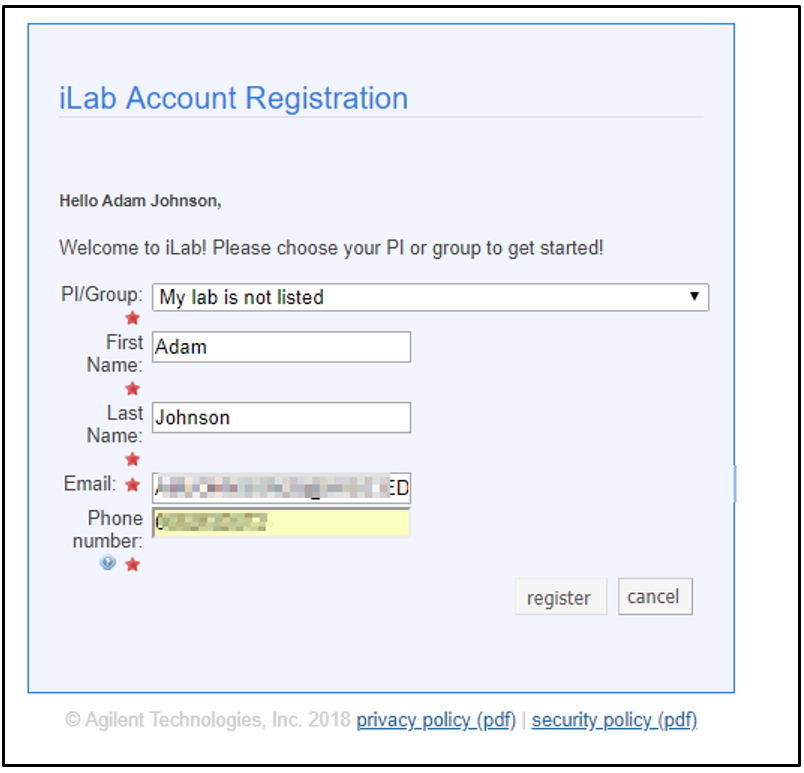
- Search the ‘PI/Group’ dropdown for your name. If your name is not there, select the ‘My lab is not listed’ option. Fill in your contact phone number. Click the ‘register’ button.
- Once your request has been submitted, the iLab team will work with you to get your group/lab created. When this is complete, you will be able to access iLab.
- Ensure that your time zone is set to Central Standard Time
- Before you are able to request services and schedule equipment with UWCCC Cores, the following steps must be complete for your lab:
ADDING YOUR GROUP/LAB MEMBERS
If your group/lab members are already registered to another group within iLab, you may add them to your group:
- In your group/lab, click the “Members” tab
- At the bottom of the page, click “Link existing user”
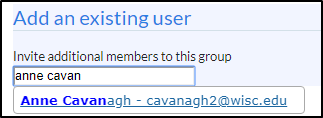
- Enter a name to search, click on the correct name in the results, and click “Add”
- The group/lab member will be able to select the group when ordering services or reserving resources using iLab
Most group/lab members will need to request access to your group. Group/lab members should follow the steps in the tab “Getting Started: Group/Lab Members,” below. Once they’ve requested access, complete the following steps:
- Log into iLab and select “My Groups” on the left navigation bar
- Select the name of the group/lab to which you want to add lab members
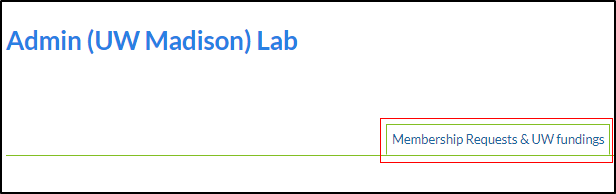
- Select the “Membership Requests & UW fundings” tab. New membership requests will show at the top of this page
- Click “Approve” to accept a member into your lab. Click “Reject” if they are not a member of your group/lab.
ADDING FUNDING ACCOUNTS (FUNDING STRINGS)
- Log into iLab and select “My Groups” on the left navigation bar
- Select the name of the group/lab to which you want to add funding account
- On the lab page, open the “Membership Requests & UW fundings” tab
- Scroll to the bottom and select “Manually add a new UW funding”
- Fill out the required information and select “Add”
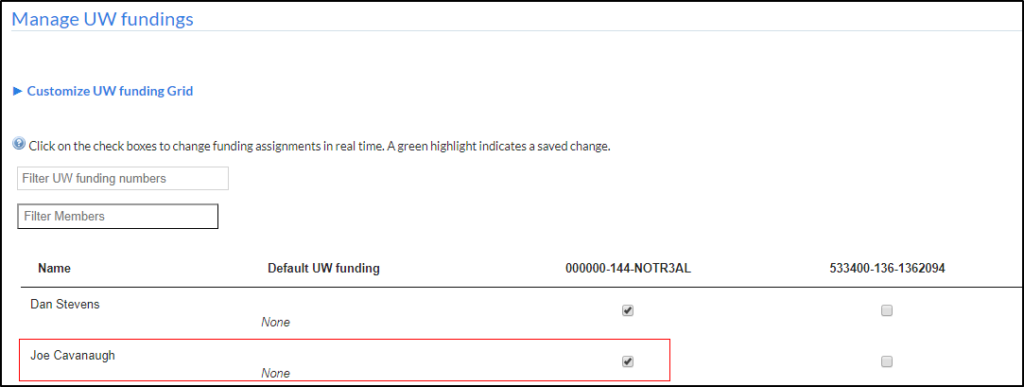
- The funding account will now be available in the Manage UW fundings table.
- Select the corresponding staff check boxes in the column for the funding account to give them access to that funding string. Group/lab members will now be able to use that funding string to request services or make appointments
OPTIONAL: DESIGNATE A LAB MANAGER/PROXY
- Log into iLab and select “My Groups” on the left navigation bar
- Select the name of the group/lab for which you want to designate a manager
- On the lab page, open the “Members” tab
- Find the member you want to designate as a manager and select the yellow pencil icon to the right of their name
- In the “Lvl:” dropdown, change their level to “Manager”
- If the member you have designated as a manager should also receive invoices for core services, select the “Core Financial Contact” checkbox.
- Select “Save” to the right of the member’s name.
Registering for an account as an external PI
REGISTERING FOR AN ACCOUNT
- Request access to UW—Madison’s service centers: https://uwmadison.ilab.agilent.com/account/1802/signup
ADDING YOUR LAB MEMBERS
If your group/lab members are already registered to another group within iLab, you may add them to using the following workflow:
- In your group/lab, click the “Members” tab
- At the bottom of the page, click “Link existing user”
- Enter a name to search, click on the correct name in the results, and click “Add”
- The member will be able to select the group/lab name when ordering services or reserving resources using iLab
Most members will need to request access to your lab. Once they’ve requested access, complete the following steps:
- Log into iLab and select “My Groups” on the left navigation bar
- Select the name of the group/lab to which you want to add members
- Select the “Membership Requests & UW fundings” tab. New membership requests will show at the top of this page
- Click “Approve” to accept a member into your group/lab. Click “Reject” if they are not a member of your group.
OPTIONAL: DESIGNATE A GROUP MANAGER/PROXY
- Log into iLab and select “My Groups” on the left navigation bar
- Select the name of the group/lab for which you want to designate a manager
- On the group/lab page, open the “Members” tab
- Find the member you want to designate as a manager and select the yellow pencil icon to the right of their name
- In the “Lvl:” dropdown, change their level to “Manager”
- If the member you have designated as a manager should also receive invoices for core services, select the “Financial Contact” checkbox.
- Select “Save” to the right of the member’s name.
Registering for an account as a group/lab user
REGISTERING FOR AN ACCOUNT
- Navigate to the core page: https://uwmadison.ilab.agilent.com/account/login
- Click the ‘Register’ link in the top right of the page
- If you have a NetID, click the ‘Register using UW Credentials’ button then follow the onscreen instructions to log in with your UW NetID
- If you do not have a NetID, click the ‘Register for an iLab account’ button and follow the onscreen instructions to create an account.
- You will be directed to an iLab Registration page where you will need to select your PI/Group, and verify your contact information
- If your PI/Group is not available in the drop down, refer your PI to the instructions “Registering for an account as a UW PI” above
- Once your registration has been submitted, your PI will receive a notification from iLab that you have requested membership to their group/lab. They will need to approve your membership and assign one or more funding accounts for your use.
Notes: Ensure that your time zone is set to Central Standard Time to make reservations
Joining a new group/lab
If you are in one group/lab and need access to another, you may either request to join the group directly, or the group management must add you.
Method One
The first method to join a new group is to request access directly. To do so, follow these steps:
- Click on the navigation menu
- Click on “Manage Groups”
Next:
- Click “Request Group Access”
You will now see the option to choose your institution (University of Wisconsin – Madison) and the group/lab you would like access to. Simply start typing the name of the PI and the group will appear. Click on the desired group/lab and click “Request Access”. The PI or manager will now be able to approve your request.
Method Two
The second method to join a group/lab is for the PI to add you. They will complete the following steps:
- In the group/lab, click on the “Members” tab
- At the bottom of the page, click “Link existing user”
- Enter a name to search, click on the correct name in the results, and click “Add”
- The member will be able to select the group/lab name when ordering services or reserving resources using iLab
Services and equipment
This is an accordion element with a series of buttons that open and close related content panels.
Reserving equipment
To create an equipment reservation, follow iLab’s Schedule Equipment instructions
Who does this workflow: any member, any core member
Note: ensure that your time zone is set to Central Standard Time prior to creating a reservation
Requesting a service
To create a service request, follow iLab’s Request Services instructions
Who does this workflow: any group user
General Lab workflows
This is an accordion element with a series of buttons that open and close related content panels.
Approving requests to join a group/lab
During the registration process, users will select the PI/Group they would like to be a part of. When a user selects you as their PI, you will see a membership request at the top of the Group’s page under “Membership Requests and UW Fundings”.
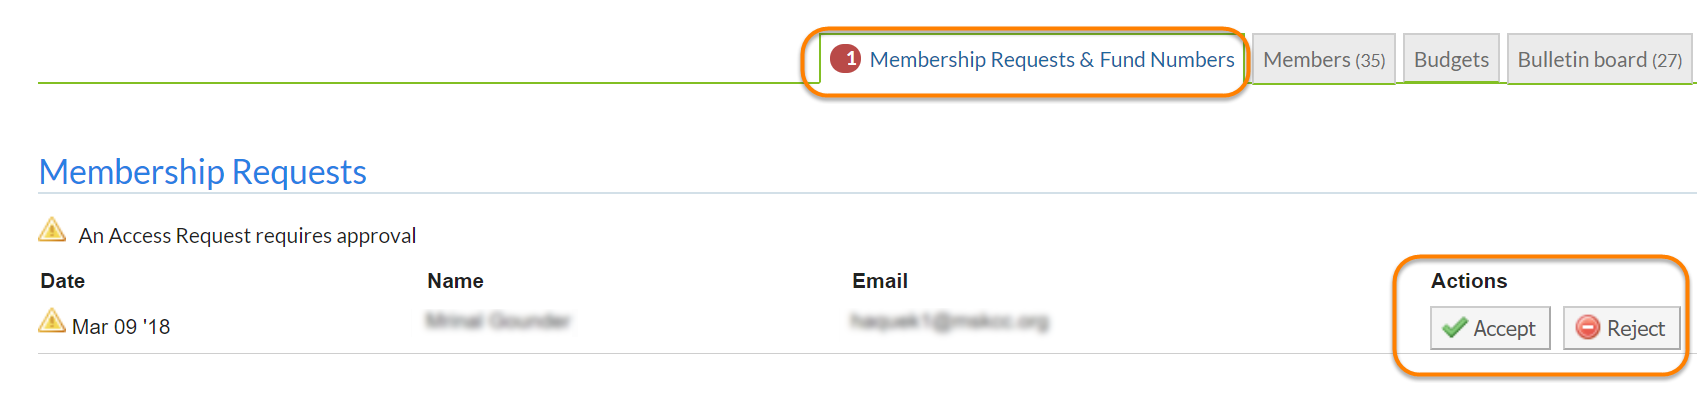
You can choose to ‘Accept’ or ‘Reject’ the membership request. If accepted, the user will be added to your Group/Lab. You will then be able to assign funding to your user.
Note that you can also manually add members to your group/lab, provided they already are registered with iLab.
Who does this workflow: PI or a designated Manager/Proxy
See also the above tab: “Registering for an account as a UW PI”
Designating a manager or proxy
- From your iLab account page, open the menu by clicking the three lines in the top left.
- Click the ‘My Group’ or ‘My Groups’ hyperlink and select the group/lab for which you will designate a manager or proxy.
Step 2: Access member information and set role to Manager
- Navigate to the ‘Members’ tab
- Click the pencil icon next to the lab member to expand the member data
- Adjust the membership to Manager in the drop-down
- Verify that the Core Financial Contact check box is checked
- Click save
For more information about member access and control, see iLab’s Manage Lab/Group Members instructions
Who does this workflow: PI or a designated Manager/Proxy
See also the above tab: “Registering an account as a UW PI”.
Adding or updating funding account to group/lab payment options
- From your iLab account page, open the menu by clicking the three lines in the top left.
- Click the ‘My Group’ or ‘My Groups’ hyperlink and select the lab for which you will add funding.
- Click on the ‘Membership Requests & UW fundings’ tab.
- Click on ‘Manually add a new UW funding’ to add a new funding string.

- Enter all applicable fields (instructions with examples are given), and hit ‘Add’.
- Under “Manage UW fundings’ in the ‘Customize UW fundings Grid’, assign who from your group/lab can access funding strings by clicking the checkbox that corresponds to the user and funding string.
Hiding Funding Accounts in iLab:
- To hide a funding string that is expired or should no longer be used, remove access to that funding string from everyone in the group. Do this by un-checking all the boxes under that funding string. If that funding string is still being used for pending charges, you will see the below pop-up asking you to choose a new funding string for those charges. Select a new funding string from the “UW funding” drop down, then click the “Update all Service requests/Reservations listed above” hyperlink.

- Once all access has been removed for that funding string, expand the “Manage UW fundings” section and find the funding string you will hide. Change the status of that funding string to “hidden”. If the hidden status is not available and you’ve confirmed that all access to that funding string has been removed, try refreshing your browser and try changing the status again. Do not delete the account by clicking the red X if it was used to pay for any services as it may interfere with future reporting. You may delete an account if it was never used (i.e. entered incorrectly).
- Who does this workflow: PI or a designated Manager/Proxy
Updating payment information AFTER an invoice has been received
If you receive an invoice that has incorrect payment information, you may update the information using the following steps:
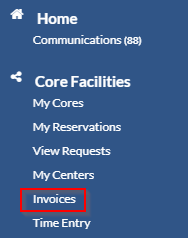
- From your iLab account page, open the navigation menu by clicking the three lines in the top left
- Click the “Invoices” button
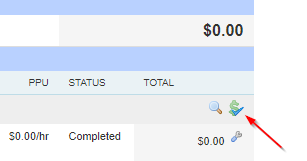
- Find the invoice in question, and click on the magnifying glass on the far right in the invoice options
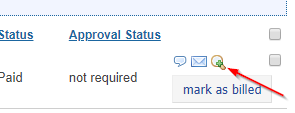
- From here you will see an interactive version of your invoice. Click on the “Dollar” symbol on the right of the charges in question
- Once you have clicked on the “Dollar” symbol, you will be presented with a payment dialogue box. First, you will select the charges you would like to update. Second, you will pick the correct funding information. Note: If the funding you wish to use has not yet been added to you group, see “Adding or updating funding account to lab payment options” workflow above.
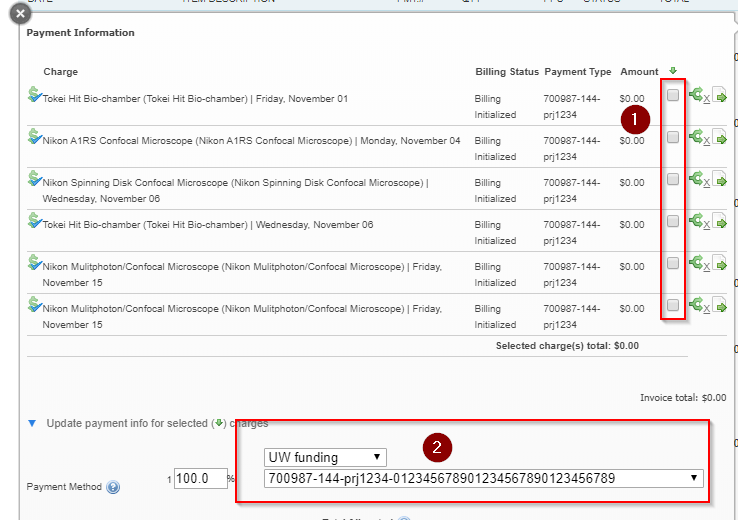
- Click “Save”
- Notify the Core/Shared resource that you have made this change. They will need to update their billing file
UW customers paying with non-UW funding
Non-UW Customers
Groups/labs that pay for UW shared resource services and equipment usage with exclusively non-UW funding strings should be configured as “external labs” in iLab, and will have only one default payment option. Payment information can be optionally entered in the free text “PO Number” field to communicate payment details. Note: Do not enter credit card information into this field.
UW Customers Paying with Non-UW Funding in iLab
If you’re a UW customer and pay for UW shared resource services and equipment usage in iLab using UW funding strings as well as non-UW funding, use the workflow described in this section to pay for services and equipment usage with non-UW funding.
- Workflows
- Paying for service requests with non-UW funding
- Create a service request in iLab
- Select “Non-UW funding” from the dropdown as your payment method. The “Transaction #” field is an optional free text field that can be left blank or used to add any additional useful information.
- Submit the service request
- Shared resource staff members will review the service request, add services to the request, and send you a quote for the services
- Work with shared resource staff to agree on a price
- Shared resources staff performs services and marks the service request as complete in iLab
- Pay for the service using the non-UW funding method you arrange with the shared resource.
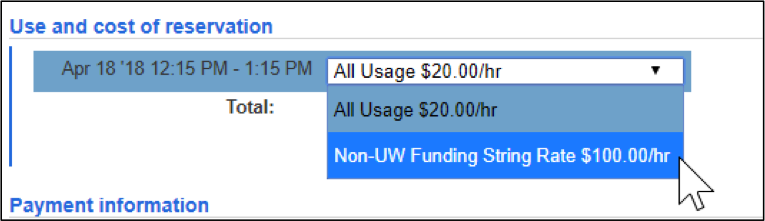
- Paying for equipment reservations with non-UW funding
- Block off time on an equipment calendar
- Select “Non-UW funding” as your payment method. The “Transaction #” field is an optional free text field that can be left blank or used to add any additional useful information.
- Select the usage type from usage type drop down that reflects the rate for which you should be charged for using the equipment. Work with the shared resources to determine which rate you should receive if you are not sure.
- Save your reservation in iLab
- Use equipment
- Pay for the service using the funding method you have arranged with the shared resource.
- Paying for service requests with non-UW funding
Still have questions?
Submit a help ticket, or e-mail support@ilab.wisc.edu for further assistance.